It’s good to have a new home but before you settle in, it’s important to take care of the plumbing details. Most new homeowners focus on décor, layout, and furniture, but behind the walls lies a complex network of pipes that can cause unexpected problems. This plumbing checklist for new homeowners will walk you through everything you need to inspect to avoid future issues and prevent costly repairs.
1. Inspect the Main Water Shut-Off Valve
The shut-off valve is your first defense in a plumbing emergency. You should know exactly where it’s located, usually in the basement, crawl space, or near the water meter. Turn it to ensure it’s functioning. If it’s stuck or leaking, it needs immediate attention.
If a water pipe bursts, you’ll need to shut off the supply quickly. Testing it now gives you peace of mind later.
2. Check for Leaks and Signs of Water Damage
This is a must-have in the plumbing checklist for new homeowners. Leaks are sneaky. Even small drips under sinks or behind toilets can lead to mold and structural issues over time. Open cabinets and inspect under all sinks. Look for puddles, warped wood, or a musty smell. Also, check ceilings and walls for yellow stains or bubbling paint, these are signs of water damage.
Use a flashlight to inspect tight spots. Any signs of corrosion around fittings or plumbing fixtures should not be ignored. If left unchecked, they can lead to major plumbing repair needs.
3. Test the Water Pressure
Water pressure that’s too high can damage pipes, while pressure that’s too low affects daily tasks like showering or washing dishes. Use a pressure gauge attached to a hose bib to test it.
Ideal pressure should range between 40–60 PSI. If it’s outside this range, a pressure regulator might be needed
Ideal PSI Range and What It Means
| PSI Reading | What It Means | Recommended Action |
|---|---|---|
| Under 40 | Low pressure | Check for blockages or leaks |
| 40–60 | Optimal pressure | No action needed |
| Over 60 | High pressure | Install a regulator |
4. Inspect All Drains and Faucets
Run water in every sink, tub, and shower. Check for slow drainage or gurgling sounds. For common kitchen issues, check out causes, fixes, and prevention of kitchen sink clogs. These can indicate clogs in your plumbing system. Lift drain stoppers to look for hair or debris buildup.
While at it, test each faucet. If water sprays unevenly or leaks around the base, clean or replace the aerator. A dripping faucet may need a new washer or cartridge.
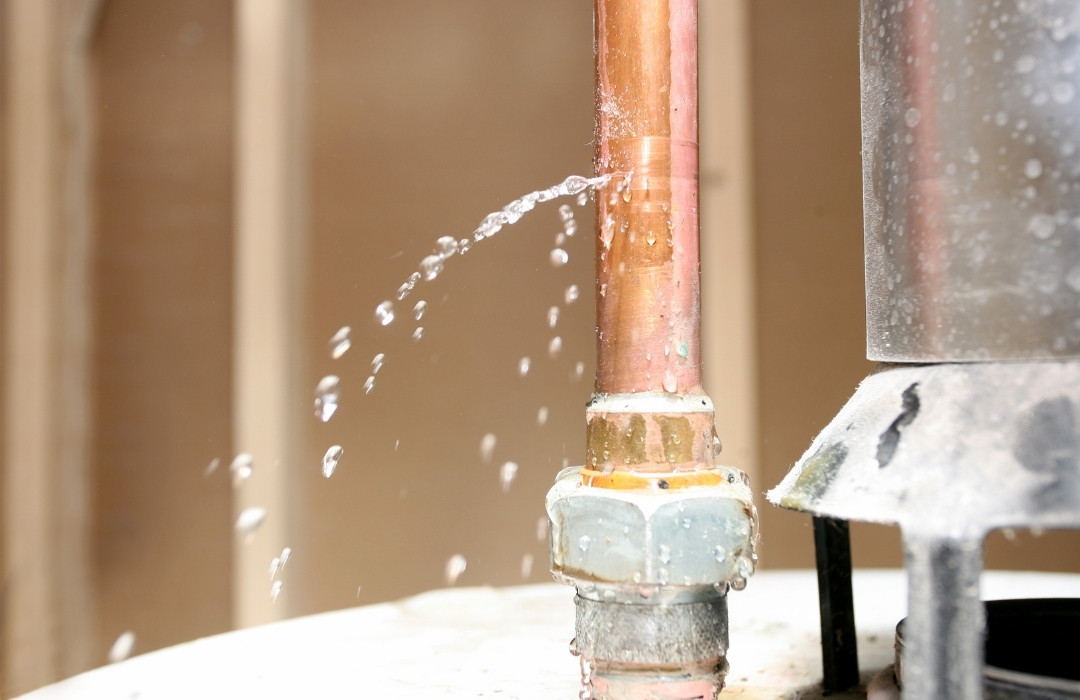
5. Evaluate the Water Heater
Your water heater is vital for comfort. Check the age by reading the manufacturer’s label. If it’s older than 10 years, replacement might be close. Look for rust on the tank, puddles nearby, or odd popping noises. These are signs the unit is wearing down.
Test the hot water by turning on the faucets. If the water takes too long to heat or runs out quickly, the heater may not be working efficiently.
If your water heater isn’t performing well, our troubleshooting guide for water heaters can help you identify the problem.
6. Identify the Type and Condition of Pipes
Not all pipes are created equal. Newer homes often use PEX or copper, while older homes may still have galvanized steel or polybutylene, both prone to corrosion and leaks.
Explore the best pipes for house plumbing if you’re considering future upgrades.
You can also review the pros and cons of different plumbing pipes to better understand your system.
Inspect visible water pipes in the basement or under sinks. Look for signs of corrosion, flaking, greenish stains, or rust. These are red flags and may require a full plumbing inspection.
7. Test Toilets for Function and Leaks
Check each toilet for stability. If it rocks or moves, the wax ring may be failing. Also, flush and listen. A continuously running toilet wastes water and signals valve issues.
To detect hidden leaks, put a few drops of food coloring in the tank. If the color appears in the bowl within 15 minutes, there’s a leak.
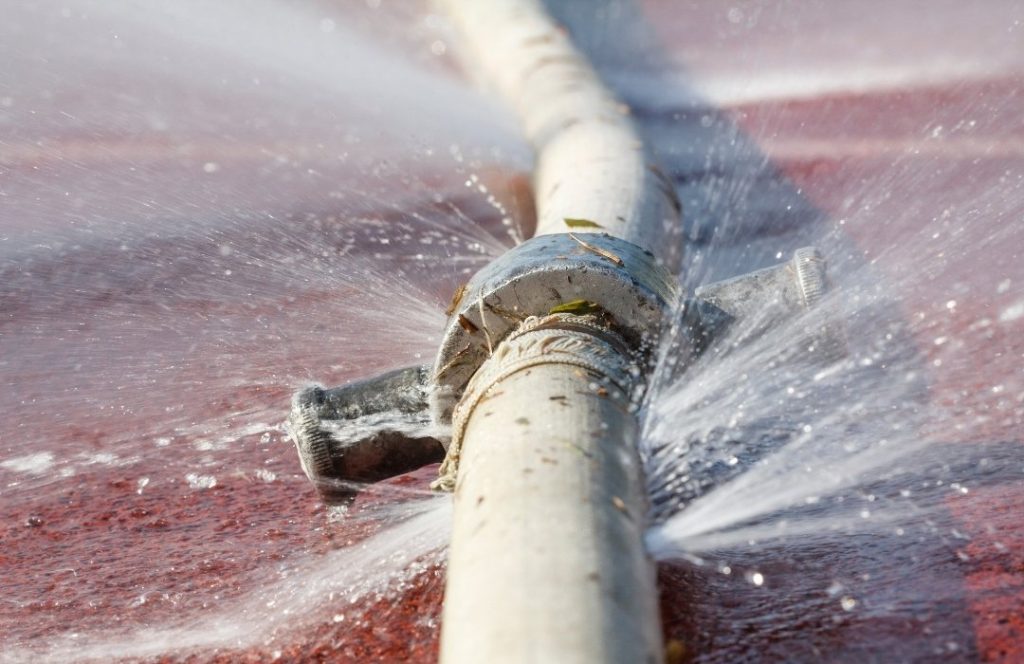
8. Review Sewer Line Condition
Problems in sewer lines aren’t always visible, but they can be expensive. Ask the seller for recent inspection records. If the home is older or has lots of trees nearby, roots may have invaded the line.
You can hire a plumber for a camera inspection to check for cracks or tree roots. Catching issues now will help you prevent costly repairs later.
9. Inspect Outdoor Plumbing
Check hose bibs, outdoor sinks, and any irrigation systems. Turn on outdoor spigots and look for leaks or reduced pressure. Cold climates may cause cracks if pipes aren’t winterized.
Also, ensure the backflow prevention device is installed and working. This protects your clean water supply from contamination.
10. Consider Water Filtration or Softeners
If the home has a water filtration or softening system, ask about the last service date. Filters need changing every 6–12 months, depending on the system.
Test the water for hardness or sediment. Hard water can shorten appliance life and stain plumbing fixtures.
11. Understand Plumbing System Age and Code Compliance
Some plumbing systems look fine but are well past their life expectancy. Pipes, fittings, and valves all degrade over time. If the system hasn’t been updated in decades, you may face more plumbing problems soon.
Also, ask whether recent upgrades meet current building codes. Non-compliant work could impact insurance and resale value.
12. Prepare for Emergencies
Keep basic tools on hand:
- Plunger
- Pipe wrench
- Teflon tape
- Bucket
- Flashlight
Have a reliable plumber’s contact info saved. During emergencies, quick action prevents major damage.
If you don’t already have someone in mind, here’s a quick guide on how to find a good local plumber you can trust.
Final Thoughts
This plumbing checklist for new homeowners helps you spot issues before they become emergencies. You don’t need to know everything, just enough to recognize red flags and know when to get help.
From checking water pressure to spotting signs of corrosion, it’s all about getting ahead of problems. Follow this guide, and you’ll start life in your new home with confidence, and fewer surprises.
FAQs
What are the 5 main items you should inspect for at a drain detail?
When inspecting a drain detail, focus on these 5 key items:
1. Drain Slope: Ensure pipes are sloped properly for efficient drainage.
2. Vent Connections: Check that vents are correctly placed to prevent airlocks.
3. Pipe Joints and Seals: Look for leaks or poor connections at joints.
4. Trap Installation: Confirm P-traps are installed to block sewer gases.
5. Material Condition: Inspect pipes for corrosion, cracks, or damage.
A thorough drain inspection helps prevent clogs, slow drainage, and costly future repairs.
What is a whole home plumbing inspection?
A whole home plumbing inspection is a detailed check of your entire plumbing system. It includes examining pipes, fixtures, drains, water heaters, toilets, outdoor spigots, and sewer lines. Inspectors look for leaks, corrosion, water pressure issues, and code compliance problems.
This proactive checkup ensures your plumbing is safe, efficient, and ready to handle everyday use without surprises.
At what stage is the piping run for plumbing in a new house?
In new home construction, piping is installed during the rough-in stage. This phase happens after framing but before drywall installation. Water supply lines, drainpipes, and vent systems are laid out according to the building plan. Proper rough-in work is critical because it sets the foundation for the home’s entire plumbing system to function efficiently.


